Posted in Tips & Tricks

Miniature Wallpaper Options & Opinions

I’ve built a decent number of dollhouses and room boxes at this point to have experimented with different types of wallpaper that you can use. I personally have used scrapbook paper, dollhouse wallpaper and actual wallpaper. I personally prefer the dollhouse wallpaper, then the actual wallpaper, and lastly the scrapbook paper if I was to rank them.

I’ll start with scrapbook paper first. Pros first, scrapbook paper is easy to obtain since you can get it at many different stores that you can shop at in person or online. It is relatively inexpensive and comes in an unimaginable number of patterns and color combinations and options. The cons, scrapbook paper only comes in squares or standard paper sizes, like 12×12 or 8 1/2×11. This makes you have more seams as well as having to match your pattern more. Another issue I have ran into is that while there are lots of different patterns many of them are on the larger size which can look out of scale in a 1:12 scale scene if that isn’t the look you are going for. Not that you can’t find smaller patterns, but it may be slightly harder to locate but there is fun in the search. Scrapbook paper can also be on the thinner side, and if you pull it to taunt it could rip.

Now for the actual full-sized wallpaper. I will be honest most all of what I have used has been vintage wallpaper that I found in storage or was thrifted. So, I do not know what brands or what type it actually was. I do not think the ones I used had self-adhesive though. I like how wallpaper looks. Most have a slight texture that adds dimension and a more unique look to your dollhouse room or miniature scene. Wallpaper is also slightly thinker than either scrapbook paper or miniature wallpaper, which makes it less likely to rip if you pull it too hard. Some negatives of it that I have found with the wallpaper though is similar to the scrapbook paper the patterns will most likely be on the larger side and it will take a bit of time and effort to find a pattern that might work for your project. Another downside is the size of the wallpaper is its size. It will have to be cut to the size you need no matter what.

Lastly, we have the dollhouse wallpaper. This is one of the most common ways to decorate the walls of your dollhouse. It has many choices of designs and colors to fit your themes available. They come in more manageable sizes, though may still need to be cut. It is available online and at some in person stores, like your local dollhouse stores or some box stores like hobby lobby. I personally prefer my local dollhouse stores between the two in person options because the quality of the papers is usually better and the designs appeal more to me usually. I have used some from both though and they do the job that they are supposed to. I also like ordering from miniatures.com and have always been very happy with all their papers, both the more expensive papers and their wallpaper assortments. A downside to dollhouse wallpaper is that many of the designs that are available can be more in theme for a house in a specific period, and it can be more difficult to find more modern designs, there are some available just not as many.

Another thing I thought of that may help you in your miniature wallpapering endeavors, is my favorite wallpaper paste I have used is the Grandma Stover’s Glue. It adheres nicely with and can be watered down with water to create a nice finish. It also cleans up easily and dries clear.

Those are the three types of wallpaper style wall finishes I have used myself. I hope hearing my opinions help you in creating your own houses.

Thanks for reading!!

Posted in Mini Find Monday

Mini Find Monday: Schliech Puppies

Today’s Mini Find Monday is a cute addition to the 1:12 scale family. I feel that every dollhouse needs some kind of animal, it helps to bring life into the house or miniature scene. Now some of the animals you buy for the dollhouses can be quite expensive, and most of them are quite fragile, I don’t know how many times I’ve had to repair a little cat tail… Now in my wanderings I ran across these two little cuties.

Now I’ve known about this brand for a very long time, my younger sister used to have quite a collection. They are a German brand that makes many different types of animals, and since they a children’s toy brand are made out of a hard plastic so they can’t break.

mfm schliech puppy-2614

The puppies that I found where the German Shepard and the Labrador Retriever. These two came from the Tractor Supply Company, for under $5.00 a piece, I can’t remember the exact price, but I know it was under $5.

They are the perfect size for 1:12 scale, with being  about an inch and a half tall and about two inches long. Here’s some close ups…

These are probably my favorite of all my Mini Find Monday finds, and highly recommend them myself. They are just soooo cute!

~Briana Signing Off

Posted in DIY's & How-To's, tutorials

Tutorial Time: Flamingo Pot

I decided to take the flamingos from Mini-Find Monday and make some beachy yard decor for our mid-century bungalow.  They turned out really cute and where super easy to make!

tutorial flamingo pot-2501

Supplies Needed:

*Plastic flamingo swizler sticks (bought at Target in the party section)

*Small buckets ( bought at Hobby Lobby)

*Small seashells (also bought at Hobby Lobby)

*Sand

*Glue ( I used Aleene’s Tacky Glue)

*Small cup for mixing sand and glue

*wood stirrer for mixing

*Small pliers (for removing bucket handles)

*Hack saw ( for cutting off sticks on flamingos)

*Sharpie or any permanent marker

I first got the flamingos ready by cutting off the excess plastic stick with the hack saw. I did varied heights since I was making three.  The plastic sticks cut easily. I did use a small piece of sand paper to smooth off the rough edge after cutting.

tutorial flamingo pot-2502

I then took the black permanent marker and colored the beaks and eyes.

tutorial flamingo pot-2503

The next step was to take the handles off the buckets.  I used the mini-pliers to bend the handle and it came right off.  Then I bent down the tabs the handle was through to the inside of the bucket. I was able to bend the tabs with my fingers.

tutorial flamingo pot-2505

Mix glue and sand together to desired consistency.

tutorial flamingo pot-2506

Fill buckets with sand mixture and place flamingos in the center and arrange small sea shells around the top of the bucket.

In an hour or less you have a summery decoration for the outside of your dollhouse!!

~Beth, Signing Off


Posted in DIY's & How-To's, Dollhouses, Mini Kits

Mini Kit Fun: Full Sunshine

Awhile back we had gotten a miniature kit off of Amazon, the Full Sunshine (H-003) of the Sunshine Series by Cute Room. It turned out to be a fun, little kit loosely in 1:24 scale. So for today I’m going to show you what we did, what we changed and our opinion of it. This would also be able to help you if you where doing the kit or a similar one, since the instructions are not in English.

Now before we get off on how we did this I do need to say that we did change things… Quite a few things but, I wanted a slightly different look, and the fabric I felt that came with it had too large of prints for 1:24 scale so we changed it, to something we have for making bedding and pillows in 1:24 scale for our shop. You can check them out soon, bedding sets like the one on the bed in the box, with a pillow of course, will be on our shop. Now where was I… ahh yes, on to building the little box!!

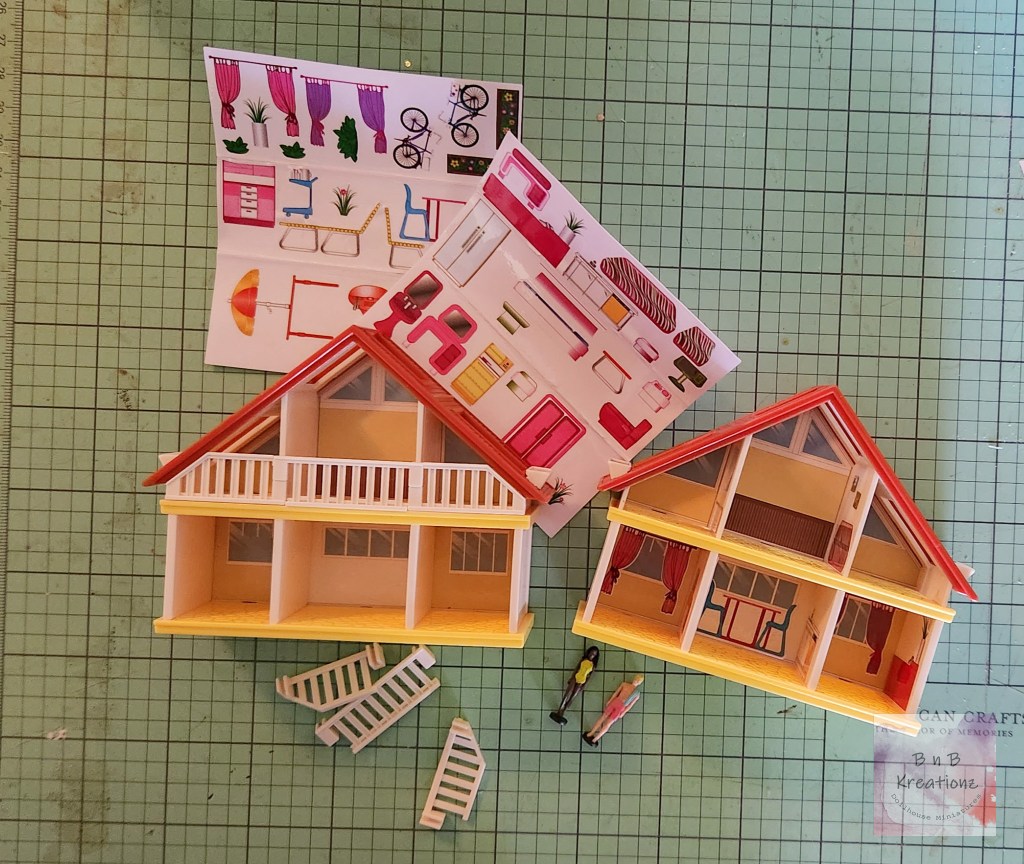
Now this little kit came in this cute little box, with each set of parts separated to make it a little easier. Now I do need to point out it did come with two instruction the colored ones are the original ones, but it did come with a xeroxed set in English. I was actually quite impressed, it really did have everything, but the glue, that you would need and was quite fun to put together.

This slideshow requires JavaScript.

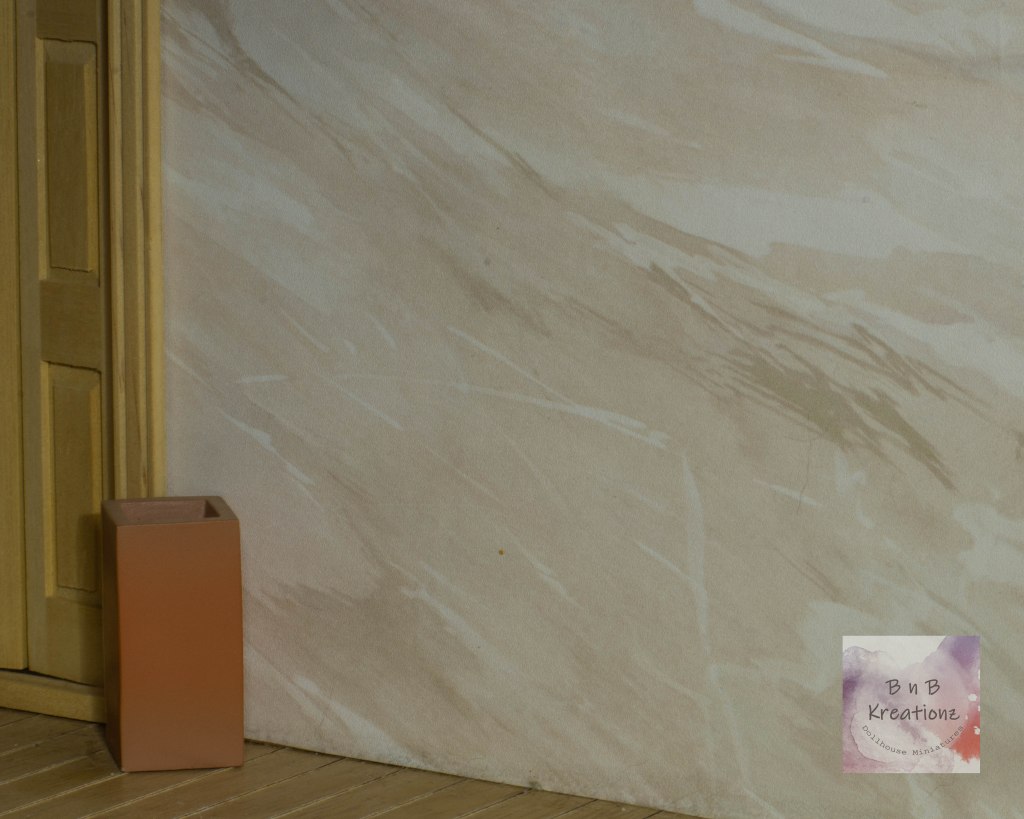
The first step that we did was getting the walls and floor covered and ready to be put together. You do have to cut them out then glue them on. I personally used Grandmother Stover’s Stickflat Glue, which is what I had on hand for my 1:12 scale dollhouses, but you could just as easily use a glue stick. It was quite easy, and the paper stuck well to the wood.

After it had dried we glued the three pieces together using Aleene’s Tacky Glue. and held them together while they dried with blue tape. I use the blue tape to keep it together because it doesn’t pull the material or rip the finish off what it is stuck to. It is the same stuff I use on my 1:12 scale dollhouses, non-sticky and strong.

This slideshow requires JavaScript.

The furniture was a little tricky to keep straight, so I turned again to the blue tape, to hold it in place. I recommend going slow, and taking your time, if you don’t want to use the tape and want to see you can hold it in place until it sets too.

To get the window into place, I cut it out with the exact-o knife then glued each piece on with tacky glue. I then added the valance a piece of lace from the kit, which I changed as well that wasn’t the actual place for it. To fit my taste for the room.

You then have to cut out all the pieces that you want, and fold and glue them all together. I then glued all the pieces down and where I wanted them to get the finished look.

And this is my finished project. I really  did like the kit. It allows you to create a little room that can fit your own tastes and you can do yourself since it has all the parts to make it. I would recommend the kit if you want to try your hand at making things yourself, but you do need to have patience to do it. I will say that, but it is fun.

Would you like to see us do another one of this style??

~Briana Signing Off

Posted in Mini Find Monday

Mini Find Monday: Barbecue Fun

This week’s mini find is a barbecue setup for your 1:6 scale dolls. The two pieces came out of the Target dollar section so they are on the very affordable side; one is a barbecue grill decoration, the other is the a set of food erasers.

mfm-bbq-2470

The barbecue grill is actually a decorative item for your home and came in at least two different colors. Our Target had the pink one that I got and a blue green one. Now the one little thing is that it does not have a grate, but that can be easily remedied. If you can find berries that still come in the little plastic crates those would be amazing, I personally couldn’t so I ended up using some chicken wire ribbon I had gotten at Hobby Lobby. Now, if you want a plastic solution and can’t find the crates, you can use plastic needlepoint canvas in the same way, just cut it in a circle and away you go. You can also paint any of it to be any color you desire to fit your aesthetic. Now for the size, the barbecue grill is seven inches tall closed and five inches tall open, with the diameter of the grill three and a half inches across. So it would make a very good little grill for 1:6 scale dolls.

The erasers are a little big for 1:6 scale, but they add a cute way to get some food for your dolls and could even be used as cakes. They do give the grill character though.

mfm-bbq-2475

The hot dog measures an inch and three-quarters long, and one inch wide. The hamburger measures an inch and one-quarter in diameter and is a half-inch wide. Like I said they are a little big but for play, or cakes they would work well for 1:6 scale.