Posted in Country Chic Farmhouse (Victoria's Farmhouse), Dollhouses

Country Chic Victoria’s Farmhouse – Staircase Alteration

After I had gotten my first doll house put together and mostly decorated, before I completely changed my mind and redid it all. I had gotten another dollhouse to make, Real Good Toys Victoria’s Farmhouse. It sat unfinished for quite a while because I had initially wanted to kit bash the house and make it almost double in size since I didn’t plan on getting any more after it. That ended up being false and many houses came along, even before the Victoria’s Farmhouse got put together. So, she sat and waited for me to make up my mind on what I wanted to do with her.

I ended but deciding not to totally kit bash her, since my plans where a little lofty for my skill set at that point, and space was at a premium; that much of an expansion of her footprint would have made it very difficult to move and find her a space to live in our own house. So, I opted instead to make little changes like adding a bathroom space and changing the staircases. Little did I know that that would be a bigger endeavor than I realized.

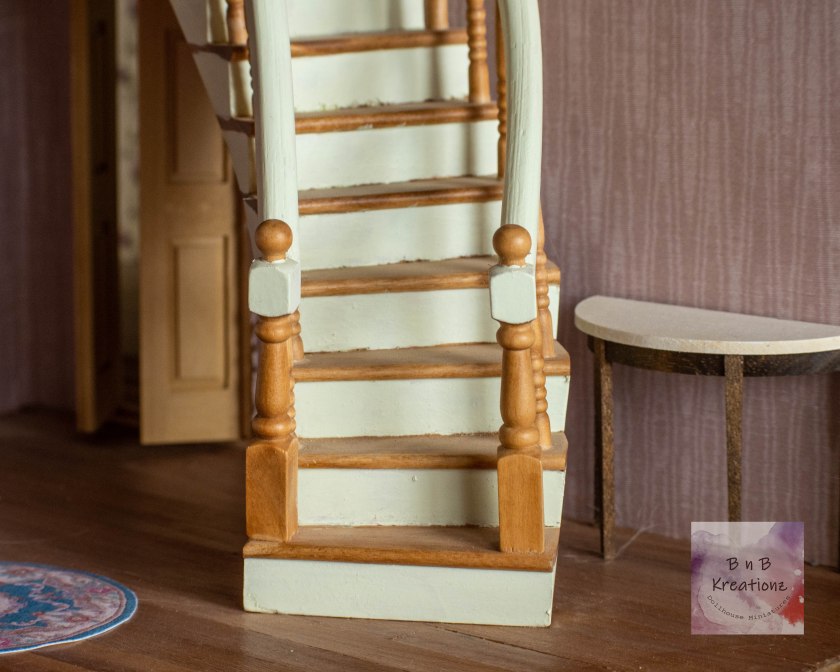
I still wanted to add a spiral staircase, that I had planned on it the beginning of my ideas. I purchased the left swing spiral staircase, and a wider straight wood staircase for the next floor so they looked like they went together. I realized rather quickly that the floor to ceiling height and the stair height where different, but I was determined to put that staircase in the house. To get it to fit, after I had cut the hole for the stairs to go in bigger, I started taking parts off the top of the stairs to try and get them to fit better. I probably should also point out that I wanted to put them in in the middle of the floor plan with no real open concept. Bold, I know!

Somewhere along the journey, with me testing and retesting ideas I had that didn’t work, I came up with my final solution. It was going to end in a hallway space, it seems very anticlimactic but, I didn’t want to completely mess up the stairs themselves beyond repair.

So, with the help of the upstairs stairs, a building square, some extra MDF I had and wood glue, I created a hidden landing and delightful division of the space for the house. I actually am extremely happy with how it turned out, but I totally see now why I have never seen a Victoria’s Farmhouse with the spiral staircase addition.

I hope you enjoy seeing this alteration to this house, and I look forward to sharing more of her as I finish it up, with some more helpful information about different parts of the finish work in the future.

Thanks for Reading

Posted in Dollhouses, Mid Century Modern (Beachside Bungalow), Updates

Beachside Bungalow: Mid Century House Update

It is the start of 2019 and one of our goals is to finish this house. We started a renovation last year but didn’t quite get it finished. We are giving ourselves a deadline this time, I hope this helps to get it finished!

Last year we did get quite alot done as you can see in some of the pictures; although at the moment it’s the catch all for everything imaginable. Had to take a picture of this mess! I think first thing is to clear out everything that doesn’t belong.

We had yet to decide what the two smaller rooms upstairs should be so that needs to be given some thought. I was thinking a small library or reading room, a sewing room, a nursery or a small bedroom. Decisions, Decisions.

We are staying with the mid-century decorating style so be sure to check back weekly to see what items we may find to create and share as we go along. We plan on finishing by April 30th, lets hope we can do it!

Posted in Dollhouses, Sunshine Shop (Three Gables House), Updates

2018 Creating Contest Update

Here I am sitting by the toasty fire looking at our almost finished house for the hobby builders contest for 2018 ( miniatures.com). We have like 4 Days left to finish, and I think we are going to make it!

We started it last summer and thought we would have it done way ahead of time but procrastination and other projects kept it moving at a snails pace. Maybe we just like to work under pressure!

We changed our mind a couple of times on the look we wanted for the outside of the house but finally decided on brick and siding. I have to say I’m very tired of doing brickwork in miniature. It took me way longer than I had anticipated to glue all the tiny bricks onto the house. Then came the siding; this turned out to be a little more difficult than we thought. Once we got it figured out it did go fairly smoothly. I did have to call on my husbands help in a couple spots!

Brickwork on the back of the house
 A close up of the brickwork on the back of the house.
Siding on the 2018 Creating Contest house from Hobby Builders Supply/Miniatures.com
The siding going up on the contest house!

I have to say it’s looking good so far and I’m confident we are going to meet our deadline!

Posted in DIY's & How-To's, Dollhouses, Sunshine Shop (Three Gables House), tutorials

How To Do A Textured Drywall Wall In Dollhouse Scale

It’s been ages since I’ve gotten a chance to post something to the blog, summertime seems to make everything  get busier. Any who, I finally got a chance to work on our in-progress house, and I wanted to show you how I made the statement wall in it. (Feel free to ask questions if you have them!!)

So on to the tutorial, of how to make a dollhouse textured drywall or plaster wall.

So to do this I used Spackling Compound, you could use something similar like joint compound, but Spackling Compound is lighter in texture so I went with that for the look I was going for.plaster wall bakery-0524

You will also need a putty knife (or something stiff you can wipe off), sandpaper (I used 220), something to create the texture (I used an old wash cloth), paper towels (for clean up), wax paper or something similar (to protect your work surface), some paint primer (to prime and protect the wall and get it ready to add color), and some paint (if you want it colored).

To get started make sure your work surface is protected and get your putty knife and Spackling Compound out. To begin with I applied a thin layer of the compound and just made sure it covered the entire wall and let it dry. I then sanded the wall smooth, do be careful doing this since the dust isn’t real good for you to breath.

plaster wall bakery-0514

Once it was smoothed to my liking, and the dust vacuumed up, I went in applied another coat of the compound. I made it a hair thicker than last time so that the texture had a better chance of showing and imprinting in deeper. So once I had as even a layer as I could get I took the washcloth and started dabbing it on the wet wall till I got a result I liked. Like I said you can use almost anything to texture, it just depends on the look you want it the end. This is the texture of the wash cloth I used if you where curious.

plaster wall bakery-0522

Now I did lightly sand the wall again after I textured to knock of any really high points, and to bring it all together as a whole wall but that is entirely up to the person doing it and how it looks to you. Here it is before I sanded…

plaster wall bakery-0518

Now once its to where you want it to look you go in and add primer to it. The primer will help protect the primer from getting dirty and from moisture, it also will get it ready for painting so it doesn’t “eat” your paint.

Here it is after sanding and primer!!

plaster wall bakery wall-0520.jpg

I really like how it turned out and I hope this tutorial will help you in your own mini adventures!!

~Briana Signing Off

Posted in DIY's & How-To's, Dollhouses, Mini Kits

Mini Kit Fun: Full Sunshine

Awhile back we had gotten a miniature kit off of Amazon, the Full Sunshine (H-003) of the Sunshine Series by Cute Room. It turned out to be a fun, little kit loosely in 1:24 scale. So for today I’m going to show you what we did, what we changed and our opinion of it. This would also be able to help you if you where doing the kit or a similar one, since the instructions are not in English.

Now before we get off on how we did this I do need to say that we did change things… Quite a few things but, I wanted a slightly different look, and the fabric I felt that came with it had too large of prints for 1:24 scale so we changed it, to something we have for making bedding and pillows in 1:24 scale for our shop. You can check them out soon, bedding sets like the one on the bed in the box, with a pillow of course, will be on our shop. Now where was I… ahh yes, on to building the little box!!

Now this little kit came in this cute little box, with each set of parts separated to make it a little easier. Now I do need to point out it did come with two instruction the colored ones are the original ones, but it did come with a xeroxed set in English. I was actually quite impressed, it really did have everything, but the glue, that you would need and was quite fun to put together.

This slideshow requires JavaScript.

The first step that we did was getting the walls and floor covered and ready to be put together. You do have to cut them out then glue them on. I personally used Grandmother Stover’s Stickflat Glue, which is what I had on hand for my 1:12 scale dollhouses, but you could just as easily use a glue stick. It was quite easy, and the paper stuck well to the wood.

After it had dried we glued the three pieces together using Aleene’s Tacky Glue. and held them together while they dried with blue tape. I use the blue tape to keep it together because it doesn’t pull the material or rip the finish off what it is stuck to. It is the same stuff I use on my 1:12 scale dollhouses, non-sticky and strong.

This slideshow requires JavaScript.

The furniture was a little tricky to keep straight, so I turned again to the blue tape, to hold it in place. I recommend going slow, and taking your time, if you don’t want to use the tape and want to see you can hold it in place until it sets too.

To get the window into place, I cut it out with the exact-o knife then glued each piece on with tacky glue. I then added the valance a piece of lace from the kit, which I changed as well that wasn’t the actual place for it. To fit my taste for the room.

You then have to cut out all the pieces that you want, and fold and glue them all together. I then glued all the pieces down and where I wanted them to get the finished look.

And this is my finished project. I really  did like the kit. It allows you to create a little room that can fit your own tastes and you can do yourself since it has all the parts to make it. I would recommend the kit if you want to try your hand at making things yourself, but you do need to have patience to do it. I will say that, but it is fun.

Would you like to see us do another one of this style??

~Briana Signing Off